Friday, May 20, 2011

The dresser moulding and how I did it...

IMG_9387
    Attaching the moulding to the top of the dresser was something I've been looking forward to doing since I started. I knew that because of seasonal movement I would need to use a method other than just glueing all the pieces around the front and sides.
    The first method I learned was to glue the front few inches and then brad-nail the rest. Norm Abrams did this a lot in the New Yankee Workshop.  I probably would have been fine with this until I read an article by Christian Becksvoort from Fine Woodworking's Woodworking Techniques. This looked like a very strong but elegant way to attach moulding to the side of my dresser. It also looked like it would be quite a challenge for me to accomplish.
    After finishing the moulding I felt that it was a little easier than I had predicted. Maybe I got lucky. I did take pictures of how I did it so I can share it with whoever is interested.

    First, I figured it would help to make sure the sides were pretty flat and square. I did as well as I could with my low angle jack, checking with my try square often.

IMG_9368

    The front moulding was cake. Cut the miters and glue it to the front. 

IMG_9370

    This was the difficult part. I cut a groove in the moulding with the table saw in two passes. It ended up being about 1/4" wide and 3/8" deep. I did the rest with a dovetail bit in the router table. To make the key I cut a piece of scrap the same width of the widest part of the dovetail. I don't work with calipers so I just got it as close as I could. Just make sure it's not too skinny. I ran that piece through the router table with the dovetail bit set at the same height on each side a little at a time until I could get a snug fit inside the length of moulding. I rubbed-on some paraffin wax to make it easier to slide on. While it was inside the moulding, I planed it flush with a block plane to make sure it wasn't too thick which would result in a gap between the moulding and the case side.

IMG_9380

    I cut the miter on the side moulding, checked the fit and adjusted it with my jack plane and shooting board.  I slid the dovetail key inside and placed the assembly flush with the case top and held it there with a clamp, leaving enough of the key sticking out to secure to the case.

IMG_9371

    Becksvoort uses wood screws to attach the keys to the case. I used cut nails because I've been wanting to use them for a while now and I just didn't have the right screws. Cut nails have amazing holding power and so I thought they should work just fine. Two important things to keep in mind when using cut nails are to predrill and orient the nail so that the flat of the nail runs parallel to the grain of the wood. Skipping either and you risk
splitting your work.

IMG_9373

    After nailing each section I released the clamp and slid the moulding back and made sure it was flush with the top again. I did this until I had the entire key attached to the case.

IMG_9381

    I used a pull saw to divide the key into sections. These should float underneath the moulding as the case moves with changes in humidity. In hindsight, I should have placed the nails a bit closer in each section to allow more movement but time will tell.

IMG_9383

With a tight fit (thankfully) I tapped the moulding on with a mallet.

IMG_9384

I stopped a few inches short to apply glue to the miter and case side.

IMG_9385

Carefully, I drove it home, tapping just enough to close the miter and squeeze out glue. Tapping too much would separate the moulding from the front of the case.

IMG_9386

    Construction of the case is now complete. Now I can concentrate on finding walnut boards for the drawer fronts, deciding what to use for the drawer sides and bottoms, and how to put it all together. Right now I'm pretty set on traditional construction: solid wood panel bottoms and half-blind dovetailed drawer fronts. Hopefully, I can have progress to post on in the coming weeks.

-RM
IMG_9387

Thursday, May 19, 2011

More work on the dresser...

IMG_8072
   Yes, it's the same walnut dresser I started over a year and a half ago. Over the last month I've finished the base and the moulding around the top. I'm not sure where time goes but it definitely doesn't stop.
    The base of the dresser was made by dovetailing the front to the two sides. I attached a 2" top to the base mitered at the corners for the carcass to sit on.

IMG_8074

IMG_8093

    After I assembled the base, cut the curves to form the feet. I cut and formed the front with hand tools. I used a coping saw to cut the curves and my Japanese rip saw for the straight section in between. 

IMG_9122

    Of course this leaves a rather rough surface to smooth-out and bring to the line. 

IMG_9124

    I used a block plane for the straight area and a wood contour plane for the curves.

IMG_9128

    This is all good practice and it was nice to use my Muji' contour plane but since I needed to speed things along I went to the barn and fetched my electric jigsaw. I almost forgot how much I love this thing. It cuts crazy good, stays on the line and the Bosch finish blades leave a nice finished surface.

IMG_9274


IMG_9275


    I had originally planned on keeping this simple curve for the design of the base but I saw a dresser somewhere that had an extra detail I wanted to include in mine.

IMG_9278

It's a subtle detail but I think it gives it a more refined look.

    The next part of the dresser to tackle is moulding for the top. Attaching the moulding to the front is cake but since the carcass is solid wood I can't do the same for the sides. Since solid wood expands and contracts primarily perpendicular to the direction of the grain, glueing another piece over a few inches across its grain can restrict this movement to the point that it would eventually crack. I've been studying a method for attaching side moulding used by Christian Becksvoort. It works great I'm sure, but it looks difficult to pull-off. I could also attach it by glueing the front few inches and use brad nails, which supposedly bend with seasonal movement, for the rest of the length but that would both be too easy and too fast... the absolute opposite of this project.

-RM

Tuesday, August 3, 2010

"Back" in the Cottage


     It's been a busy summer this year and I haven't had much time to devote to woodworking. But I can't say that I'm really sorry about that. We've had a summer full of vacations, concerts, cookouts and just great times with my family. On a personal note, I've been working really hard to improve my physical fitness this year; I've dropped almost twenty pounds since January. Shawn and I ran our first half-marathon in seven years, I finished the Insanity workout program, I started mountain biking again after ten years and completed my very first Sprint Triathlon for my 38th birthday last Sunday on August 1st. I feel great. 
     During this time, however, the six-drawer dresser lay here in the cottage patiently awaiting attention. After reacquainting myself with the game plan and remembering which parts go where I took a deep breath and glued up the drawer supports and dividers. Not too bad. 
     Next up was the back. I decided to make a frame and panel back as opposed to shiplapped mostly because I thought it might be a bit quicker and would save a bit on the weight. The joinery for the back panel was just simple stub tenons into grooves cut for the panels.


     So now I've got what's looking more and more like a dresser. In the coming weeks I will be working on the base, the moulding, six dressers and some type of finish. I'm really looking forward to the moulding because I want to use a method discussed by Christian Becksvoort. It looks challenging so I hope I can pull it off.
     
-RM

Thursday, March 4, 2010

Sharpening Setup Jig


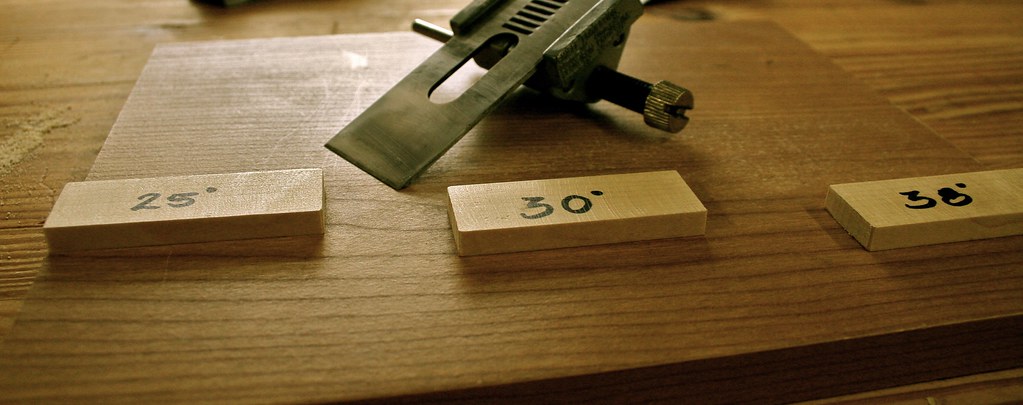
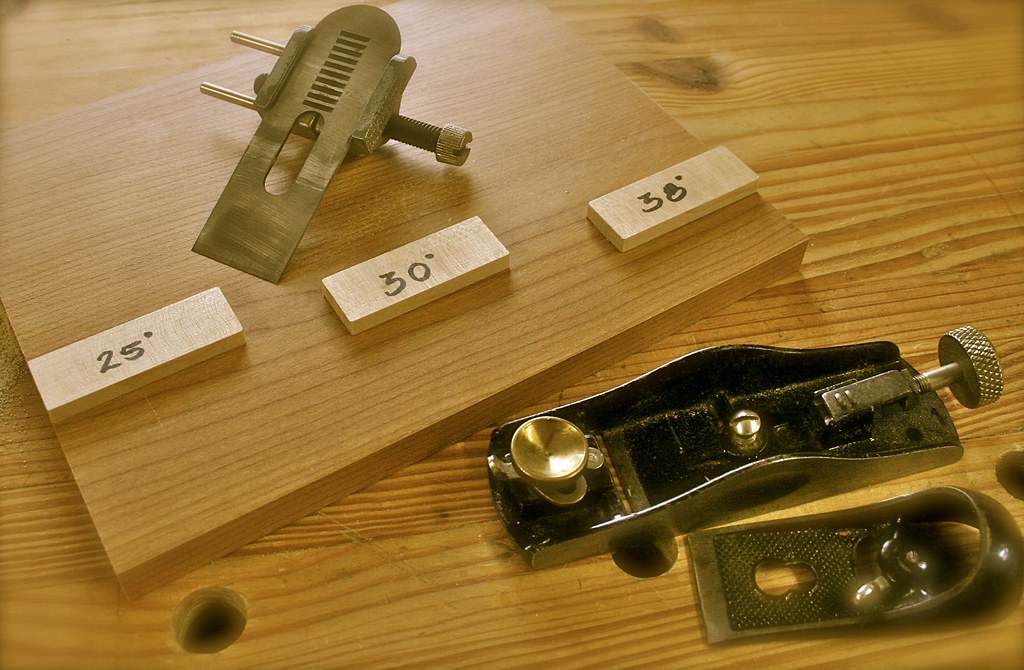
    I had a couple hours to work in the cottage so I thought I would spend it making an angle jig to make it easier to sharpen my blades nd chisels. No, I'm not very good with free-handing on the stones yet, but maybe someday I will be. I've been wanting to make one like this since I saw Angie Kopacek use one at a Lie-Nielsen show in Cincinnati a while back. I think it beats using a protractor-type angle finder because it seems faster and easier to set the same angle on your honing guide every time.
     So here's how I made mine:
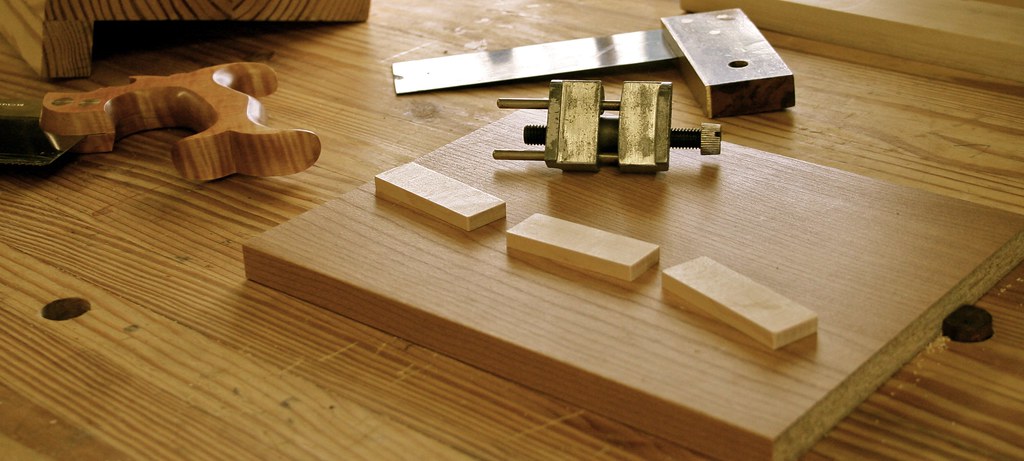
I found some decent particle board shelving with a laminate veneer in the trash pile. Then I cut a few pieces of maple for the angle stops.

I set the distance of each one I put a blade in the honing jig and set it for the angle using my angle finder. This is how I normally set blades up for sharpening.


After I tighten the blade in the jig, I set it on the board with the jig against the edge and a maple block against the edge of the blade.


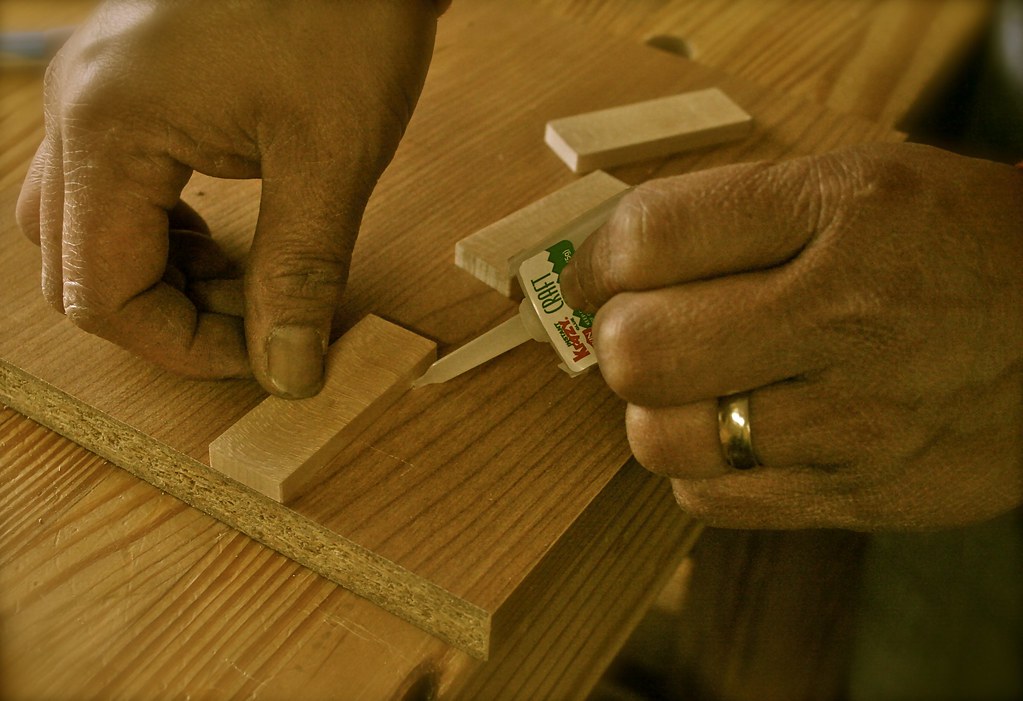
I could have nailed or screw down the stop blocks at this point but it probably would have moved on me so I just held them there while I put on some "crazy glue" around the edges. After this sets up I'll be able to put-in some nails  without anything moving around.


I settled on just a few angles for now. I figure 25, 30 and 38 degree stops should be a good place to start. The important one for me was the 38 degree stop. I've been needing to put a steeper angle on the smoothing blade for my low-angle jack
to help out with the wild grain in all this walnut. I did intend on making a 35 degree stop but it semed too close to 38 degrees to make much difference.


     Well, it's nice to finish something finally. Hopefully this will help to keep the blades sharp. I am planning on purchasing another bench stone soon and I think I have decided on the Spyderco brand of stones. So far I'm sold on the notion of not having to flatten as often (supposedly if hardly ever), not having to soak them and only having to use vey little water. If I can get one I'll be sure to post about it. 

-RM

Monday, March 1, 2010

Wonderful video...

    I got the link to this video from a Twitter "tweet" by Mark Spagnuolo, aka the Wood Whisperer. I really loved it and wanted to share it with you. I can already smell the fresh-sawn pine in the barn on a sunny summer afternoon. Enjoy!


-RM

Back in the Cottage!

Forgive me blog readers, for I have lapsed. It's been... ahem... two months since my last post.


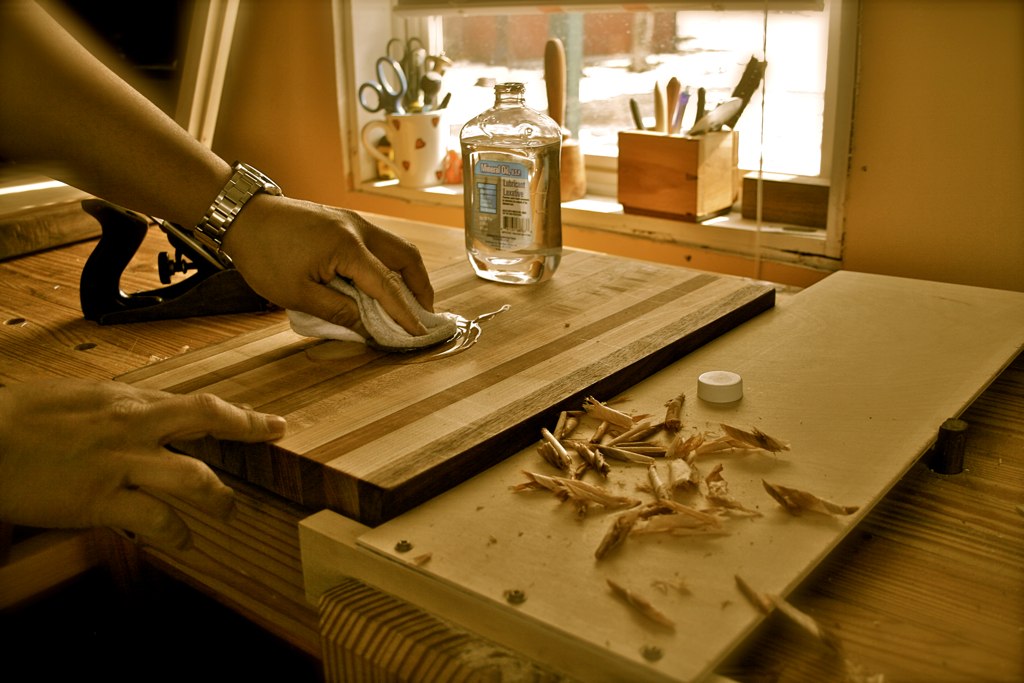
    January and February run a bit busy around here but I found a way to get back in the workshop last weekend for the first time in a couple months. I was cleaning up the house and getting ready for my son's  ninth birthday party when I realized the cutting boards needed to be resurfaced. "What a shame",  I thought, "to have a nice, clean house but such shabby cutting boards". Actually, I thought it was an excuse to take a break. 
     After clearing all the dust and cutoffs from the top of the bench I secured the planing stop to my right and placed a cutting board up to it to allow me to plane across the grain. When I made these cutting boards a year or so ago I didn't pay much attention to the direction of the grain. This wasn't too much of a concern at the time because I finished them with a random orbital sander, although I did get a little tear-out with the electric planer. This of course plays hell with the hand planes.
     If you're concerned about tear-out when hand planing wood it really helps to apply alcohol or, with cutting boards, mineral oil. Besides, it's good for the hands. And I'd imagine it helps to keep the planes from rusting. But probably the most helpful with preventing tear-out today was using a hand planing  method called traversing. This is when you plane at a right angle to the grain of the wood. 


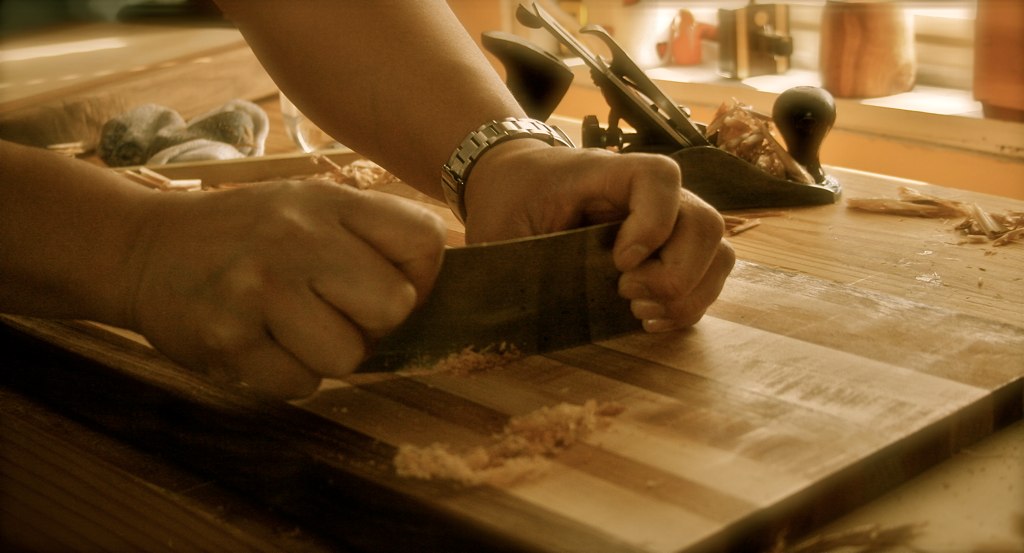
     Using my no. 3 (Stanley with Hock irons), I traversed the walnut, cherry and maple laminations resulting in a much improved surface and showing a very slight scallop, compliments of a cambered plane blade. I also made some diagonal passes. I did try to plane in the direction of the grain for some finishing passes but that only resulted in more tear-out. So, more traversing.


    While traversing results in a much better surface than one with a lot of tear-out I wanted to even things out a bit more. So, I pulled out my cabinet scraper and made a few passes. 


     After the scraping I took the boards back into the house and slathered-on the mineral oil. Just like new. Try that with a plastic or glass cutting board! 
     The birthday party went well. And even though none of the cutting boards were used, or even seen for that matter, I'm convinced it was time well wasted.

-RM


Monday, December 28, 2009

Christmas Gifts for the Workshop


    I hope everyone had a wonderful Christmas. I had a great one this year blessed with lots of gifts, parties, family and food. Judging by the gifts I must have been a good boy this year.
     I got two books. The Workshop by Scott Gibson is a very inspiring book full of pictures of woodworking shops and studios. The other book is the one which was probably on most hand-tool user's wish list -The Joiner and Cabinet Maker by Schwarz and Moskowitz as well as the original anonymous author.


     The Joiner and the Cabinetmaker is a story about a young apprentice in a rural English woodworking shop in he early 1800's. Within this story he builds three different projects using the tools and techniques of his time, all of which is explained and detailed by Christopher Schwarz and Joel Moskowitz. The book includes a CD with narrated slide show by Schwarz (excellent from what I've been able to see so far) as well as SketchUp files of each project so that you can use Google SketchUp (a free downloadable application) to look at them in 3-D or take them apart as you wish. The readers are encouraged to build along with the instructions which is what I'm thinking about doing. I've still got my dresser project on my plate, but I may have to squeeze-in another.
     The other workshop-related items I got as gifts were the two mini-sized offerings from Lee Valley tools. I came upon the pocket marking gauge and the miniature shoulder plane the day they were announced and just had to have them.


    The pocket gauge is pretty cool. It has an adjustable marking head on both ends which gives you the ability to keep two different measurements set during a project. It's fairly easy to set one-handed and the cutting wheel will recess into the fence to keep it safe after use.
    The Veritas miniature shoulder plane is just neat. It's really small but well made. I actually works pretty well but even if it didn't it would serve just fine as a conversation piece on a shelf, displayed as decoration or jewelry on a chain. I honed the blade and then used it to make a 1/4" dado in some scrap poplar. Not too bad...


I scored the width of the dado with a square and a marking knife, then clamped a straight-edge to one side to guide the shoulder plane. After every third pass or so I scored the sides again with the knife.


    Ultimately, I'm not sure this would be used often but it's nice to know that it could be used. It came in a nice black case which is where I'll keep it until that time comes.
    My favorite gift, of course, was the new sign for the Cottage Workshop. Here it is...


     I hope you all had a merry Christmas and, if I don't blog until then,
HAVE A HAPPY NEW YEAR!

-RM


Tuesday, December 15, 2009

Mortising by hand: not as hard as I thought...


    Moving onward, I come to yet another opportunity to connect with the Luddites of the past. I need to create twelve mortises in the drawer dividers to house the drawer supports. It's December in Indiana and it's cold. Sure, it could be in the 60's tomorrow followed by a blizzard but for now, I'm not going to spend any time working in the barn if I don't have to. I have all I need in the warm cottage: a mallet, marking gauge, clamps and a 1/4" mortise chisel.
    As usual, I've scoured the internet to learn what I could about mortising by hand. Of all that I found I found these videos the most helpful. Both are of Frank Klausz, a master cabinetmaker originally from Hungary. He really seems to be a great teacher so I must plan on obtaining some of his videos.

This one is from FineWoodworking.com. It even shows how he allows for a haunched tenon...

http://www.finewoodworking.com/SkillsAndTechniques/SkillsAndTechniquesArticle.aspx?id=26994

This one is from a Woodworking in America demonstration and is just cool. You can see everything that happens under the surface when you chop a mortise. You can even hear Roy Underhill talking in the background! The fact the Mr. Klausz completes the mortise without breaking the glass makes this not only a woodworking demo but a pretty good magic trick.


I did read a post from Tom Fidgen about mortising just recently. He's working on a sharpening station for his workshop.

Well, here's how I did...

     First, I set my mortising gauge to the width of my chisel.


     After centering the gauge on the back of the drawer divider I marked the areas for the mortises including their lengths. I'm sure there are many ways to clamp a piece like this but this is how I did it...


Using a hand screw with a holdfast was very adequate and I was able to clamp pieces into position very quickly.
     The chisel is positioned between the lines and held square to the sides of the piece. This is easier to do when you position yourself like I am here. I followed the same chopping sequence performed by Frank Klausz in the video and took care to make a shallow initial pass first to define the mortise. Be sure to leave the ends alone until you're almost done. After that I whacked the heck out of it until I reached my depth of 3/4" to 1". I finished by defining the ends of the mortise, making sure they were square to the edge.


     Making one mortise took about 3 to 5 minutes. This is just a bit longer than it would have taken using my mortiser. Not too bad. My experience with this is consistent with my other findings. With sharp tools and the right techniques working by hand is much easier and faster than you think. It's definitely warmer.

-RM


Friday, December 4, 2009

What Mistake?


So here I am, on a roll and ready to breeze through some more stopped sliding dovetails. I've got the process down pat and looking forward to the challenge of hand cut mortises. I finish two of them rather quickly and sit back feeling good about what I've done. Wait... that doesn't look right. I laid out one of the dovetails in the wrong place. Yup, the ones for the front of the case. I'm an idiot.
     After cursing under my breath (Ryan was playing trains in the cottage next to me) I try to figure out how I was going to recover from such a stupid mistake. My first thought was to leave it and move the rear drawer divider up to match. Doing that wouldn't require a patch that may be seen, even if I would be the only one who would notice. It would, however, change the drawer sizes which would be kinda lame since I made an effort to design them to be graduated in size.
       In the end I decided to stay with my design and  patch it. I was skeptical at first, but I decided I could find a reasonable match to make it happen. As a result, I think it works and I have something new to blog about. Here is what I did...


     I used the same cutting guide to make a few pieces to fit in the errant dovetail socket. I'm getting better at being creative with the clamps.


     I glued all three in the socket, leaving the best fitting piece for last. The result looked a bit rough but I was optimistic.


     A little work with the block plane...


     ...and a scraper...


     ...crisis avoided. Now,  I just have to find some way to keep from cutting another dovetail socket in the same place!


     So there you go. I screwed something up, but instead of changing the design I decided to fix it and move on. Design proportions taking a priority? Maybe George Wilson is getting to me after all.


-RM


Wednesday, December 2, 2009

Stopped, sliding dovetails... by hand.


     While there is a virtual smorgasbord of information on through dovetails by hand, there isn't much on sliding or stopped sliding dovetails by hand. I did find an excellent tutorial on sliding dovetails by Derek Cohen, a woodworker in Australia. There's also one by Kari Hultman (is it my imagination or do I seem to mention her in almost every post?).  Actually, I'm not even sure of the correct name for this joint. I've read about people calling it a housed dovetail, half blind dovetail, a dovetail dado, and a grooved dovetail dado just to name a few. For now I'll just refer to it as a stopped sliding dovetail, kinda like a stopped dado. Anyways, while similar to the sliding dovetail, it seems to be a different animal when you think about creating one. You can't just saw an angled kerf through to the other side. It's stopped to the width of the piece being housed in it. Most sensible woodworkers just use a router with a dovetail bit and a jig. Some woodworkers prefer to rout out most of the waste with a straight bit and then finish up with the dovetail bit. It's routed out to length and then squared up with a chisel if you wish. Since I didn't find exactly what I was looking for, and since I've never been fond of electric  routers, I decided to accept a challenge to figuring out my own way. After a lot of daydreaming and tinkering in the cottage, I came up with a process that works for me.
     The first thing I did was to make 2 guide blocks for sawing, beveled to the angle of my dovetails. I made two because I wanted to put a fence on them to make for a quicker setup. Not only could they be placed without a square, since the fence was a continuation of the angle I could easily see where the guided cut would end which takes out a lot of guesswork and layout time. I also made another guide block with the same bevel to serve as a paring guide for the drawer support pieces.


     Since the guide blocks take care of my angles I only need to layout and mark the location and thickness of the drawer supports, and the depth of the dovetail socket. I cut two measuring sticks. One to the height of the bottom drawer and the other to the height of the top drawer. I used these to mark the location of the drawer supports on either side to make everything consistent. As with my carcass dovetails, I used masking tape to make everything more visible. I marked the thickness of the drawer support using an offcut (offcuts are great to keep during a project for times like these, just be sure to label them). Then I used a marking gauge to mark the depth of the socket. 


     At this point I have all the info I need to make my cuts. I place the sawing guide block over the layout marks so that the fence registers with the bottom corner of the layout. I start the cut with my crosscut back saw, keeping the saw pressed against the guide block. I try to be careful to saw down to the depth mark on the edge. On the face I saw past the mark because it will make for less work chiseling out the waste, besides it will be covered by part of the drawer frame.  For me the key about using a guide block for this has been to not depend on the guide so much that I forget good sawing techniques. Keep a relaxed grip and your arm in alignment. Wax on the saw blade doesn't hurt either. 


     The rest of the kerf will be cut to depth using a Japanese dovetail saw. This works well because it has teeth at the tip enabling it to cut all the way to the end of the dovetail socket,  and it cuts on the pull stroke which keeps the sawdust from clogging things up. I put a piece of tape on the blade to mark my target depth. 


     After both sides of the dovetail socket are cut I use the chisels and a mallet to knock out the majority of the waste. I pay careful attention to the show side of the joint removing just a little section first. After this I can knock out the rest pretty easily. 


     Two things I found helpful are to take only a quarter-inch at a time and to twist the chisel after splitting each section to try to turn the waste chunk making it easier to remove without getting it wedged-in. If there's still a lot of waste left after the chopping you can run the chisel parallel with the depth to clean it out a bit.


     If you're really good I suppose you could finish it all up with the chisel but I am fortunate to have a router plane. This is neither as loud or obnoxious as its tailed equivalent. I set the depth and rout the bottom to a finished depth. Skewing the blade help to get into the corners. Having a perfect bottom is not important. As long as the angle of the walls are right and the drawer supports are cut right I should have a tight fit.


     Cutting the dovetail tenons are much easier and faster as I had thought. I've seen this done easily with a dovetail plane. I don't have a dovetail plane so that means I'll be using a chisel. After coming up with this next part I don't think I'll be wanting a dovetail plane anyway.
     The nice part about cutting this joint is that the angles are all the same. I made a guide block to use as a paring guide with the same bevel angle as the other guide blocks. The way I use it is about as simple as it gets. I position it at the end of my drawer support on the bench and secure them between the wagon vise and a bench dog. I put a clamp near the middle of the stock to keep it from bowing up from the pressure.


     I make sure the top edge of the stock meets the edge of the beveled guide block. Here I use playing cards as shims to make it even. 


     I've marked the shoulder to the depth of the dovetail socket, made a deep cut with a marking knife and square and then cut a fence for the saw with a chisel. Making a fence, or trough, for your saw to ride in is a great technique. Clean, accurate cuts every time. Using a wide chisel, you can find the depth of your shoulder. I'll cut down to this line with  my crosscut saw.


     To pare away the waste I've found it easiest to cut across the grain with a wide chisel, working down to the angle of the  guide block when half of the chisel is riding on the block and the other half is cutting the dovetail tenon flush. The amount of waste is small so this all goes surprisingly fast.


    At this point you can fit the pieces together and adjust as necessary. The few I've done so far have not needed to be adjusted much at all. Lucky, I guess. What has resulted is a strong joint ready for glue. This may not be picture perfect but it's the drawer support in the back. I need to watch my layout lines better for the ones in the front.


     Well, that's what I've come up with. I'm sure there are other ways to skin this cat. If you have any other techniques please feel free to share. Until then, I have to finish up the rest of these stopped sliding dovetails and move on to mortise and tenons (by hand of course), moulding, the dresser base and eventually  drawers. We're getting there, a little bit at a time. Oh, and if anyone knows what the official name of this joint is please, let me know!

-RM