So here's how I made mine:
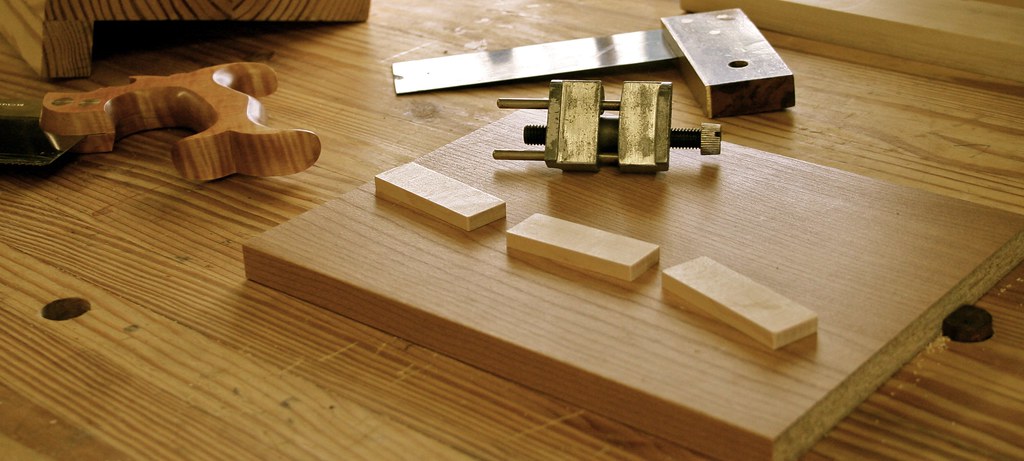
I found some decent particle board shelving with a laminate veneer in the trash pile. Then I cut a few pieces of maple for the angle stops.
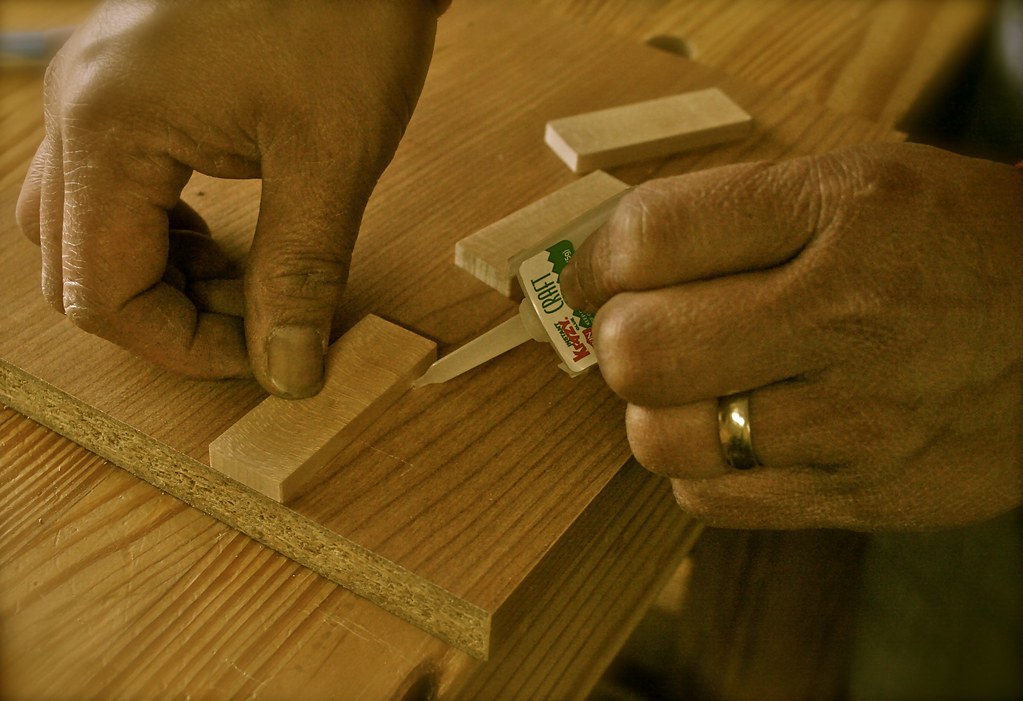
I set the distance of each one I put a blade in the honing jig and set it for the angle using my angle finder. This is how I normally set blades up for sharpening.

After I tighten the blade in the jig, I set it on the board with the jig against the edge and a maple block against the edge of the blade.

I could have nailed or screw down the stop blocks at this point but it probably would have moved on me so I just held them there while I put on some "crazy glue" around the edges. After this sets up I'll be able to put-in some nails without anything moving around.
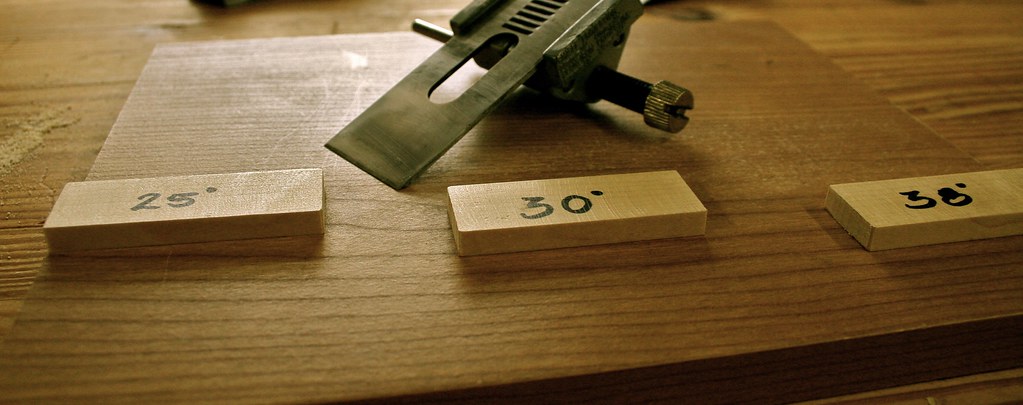
I settled on just a few angles for now. I figure 25, 30 and 38 degree stops should be a good place to start. The important one for me was the 38 degree stop. I've been needing to put a steeper angle on the smoothing blade for my low-angle jack
to help out with the wild grain in all this walnut. I did intend on making a 35 degree stop but it semed too close to 38 degrees to make much difference.

Well, it's nice to finish something finally. Hopefully this will help to keep the blades sharp. I am planning on purchasing another bench stone soon and I think I have decided on the Spyderco brand of stones. So far I'm sold on the notion of not having to flatten as often (supposedly if hardly ever), not having to soak them and only having to use vey little water. If I can get one I'll be sure to post about it.
-RM
4 comments:
I made a similar jig a few months ago. They are quite useful. Good thinking with the crazy glue. I had trouble getting mine to stay in place when I nailed them in. Oh well, one of these days I'll get myself a Veritas MKII guide, which will make my jig obsolete anyway. By the way I just read your old post on sliding dovetails. Brilliant! I've been wanting to start using those but haven't known where to begin. Very helpful, post!!!
Thanks! My work here is done, folks.
But seriously, I appreciate the comment. I've learned a lot just lurking other sites and blogs. This is one of the best ways to keep this craft going.
Take care,
-RM
I'm now seriously considering the 8000 grit Shapton ceramic on glass bench stone. A bit pricier ($89 @ LN) than the Spyderco ($55 @ Amazon) but there are many more reviews and tests (all positive) for the Shaptons.
Still looking...
I just added your blog to my site at www.unpluggedshop.com When you post new content, it will pick up your RSS feed and display the headling so my readers can click over to your site and read the latest. It takes about 1-2 hours for your new content to make it to my site. Let me know if you ever have any questions or comments.
Luke
Post a Comment